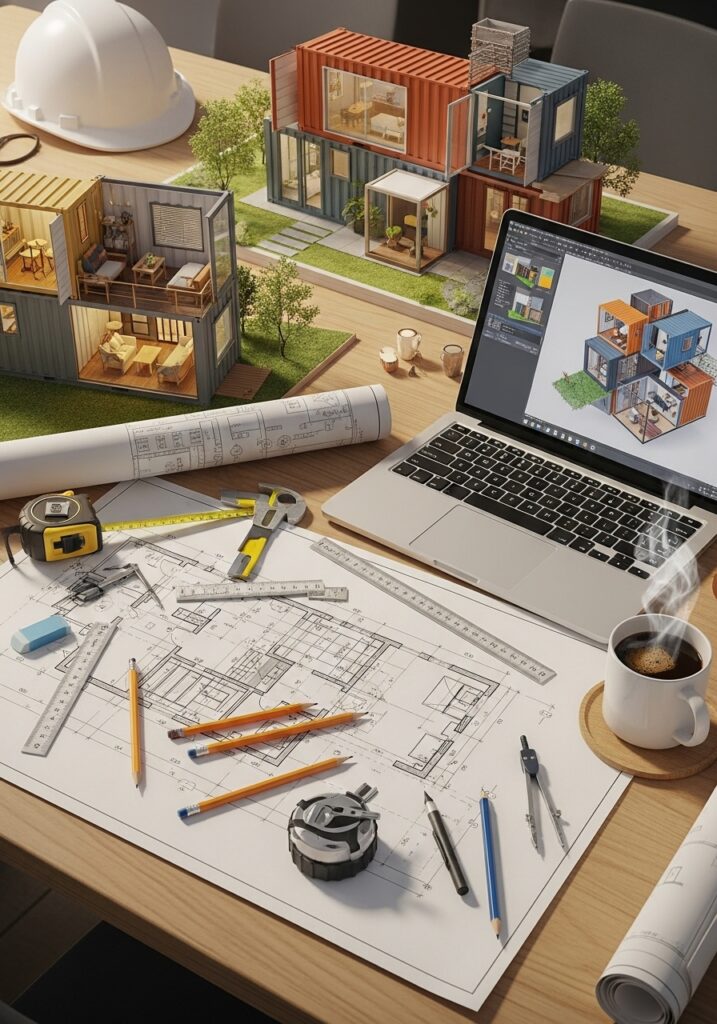
DIY Container Home: Your Step-by-Step Guide to a Dream House
Have you ever dreamed of living in a modern, cozy, and sustainable home that’s uniquely yours? If so, a container home might just be the perfect option! With the rise of tiny living, eco-friendly design, and creative DIY projects, more people are turning to shipping containers to create their dream homes. In this DIY container home guide, we’ll walk you through step-by-step container home construction, from planning to finishing touches, so you can confidently build your own shipping container house.
Step 1: Planning Your Container Home
Before picking up a single tool, proper planning is key. Container home design and construction tips start with understanding your space, needs, and budget.
Choose the Right Containers – Standard shipping containers come in 20-foot or 40-foot lengths, but high-cube containers offer extra height if you want a roomier interior.
Determine Your Layout – Sketch a rough floor plan. Consider bedrooms, living spaces, kitchen, and bathrooms. Think about natural light, privacy, and storage.
Check Local Regulations – Many areas require permits, inspections, or zoning approvals for container homes. Always check before starting construction.
Set a Budget – Containers are inexpensive, but insulation, utilities, and finishing can add up. Following a budget-friendly container home building guide will prevent overspending.
This planning stage sets a strong foundation for a smooth tiny container home construction tips experience.
Step 2: Preparing the Site
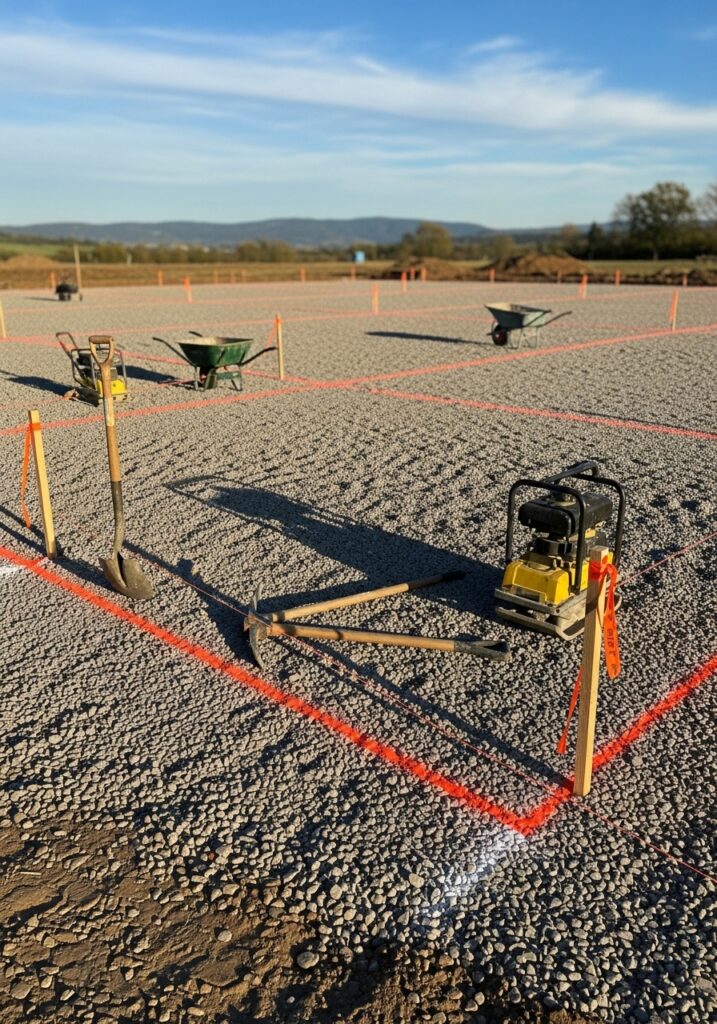
A stable site is critical for a durable container home.
Foundation Types – You can use a concrete slab, pier, or pile foundation. Slabs work well for small homes, while piers are ideal for uneven terrain.
Level Ground – Make sure your site is leveled and compacted to avoid structural issues later.
Utilities – Plan for electricity, water, and sewage access early. Installing utilities after placing the containers is more challenging.
Proper site prep ensures your creative container home building steps run smoothly, reducing headaches during assembly.
Step 3: Placing and Modifying Containers
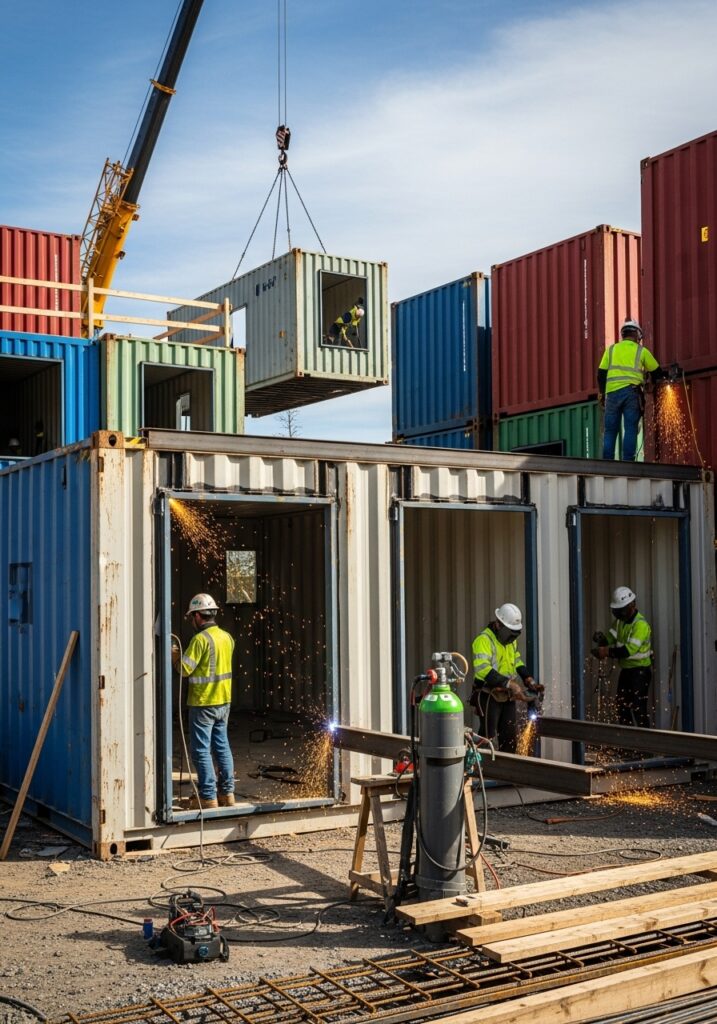
Here’s where the fun begins!
Stacking and Aligning – Decide whether your home will be single or multi-story. Multi-level builds may require structural engineering support.
Cutting Openings – Add doors, windows, or sliding glass panels. Use proper cutting tools and safety equipment.
Reinforcement – Cutting walls can weaken the steel structure. Reinforce edges with steel beams or frames to maintain strength.
These steps are where your modern container home DIY ideas can shine. Experiment with unique layouts, rooftop decks, or mezzanine levels.
Step 4: Insulating and Weatherproofing
Metal containers aren’t naturally cozy. Insulation and waterproofing are essential for comfort.
Insulation Options – Spray foam, rigid panels, or blanket insulation all work. Spray foam is popular for air sealing and energy efficiency.
Ventilation – Install vents or small windows to prevent condensation and improve airflow.
Weatherproofing – Seal gaps with caulking and use rust-resistant coatings. Protecting your home ensures longevity, making it a safe haven for years to come.
Following these container home DIY tips guarantees a comfortable, energy-efficient space.
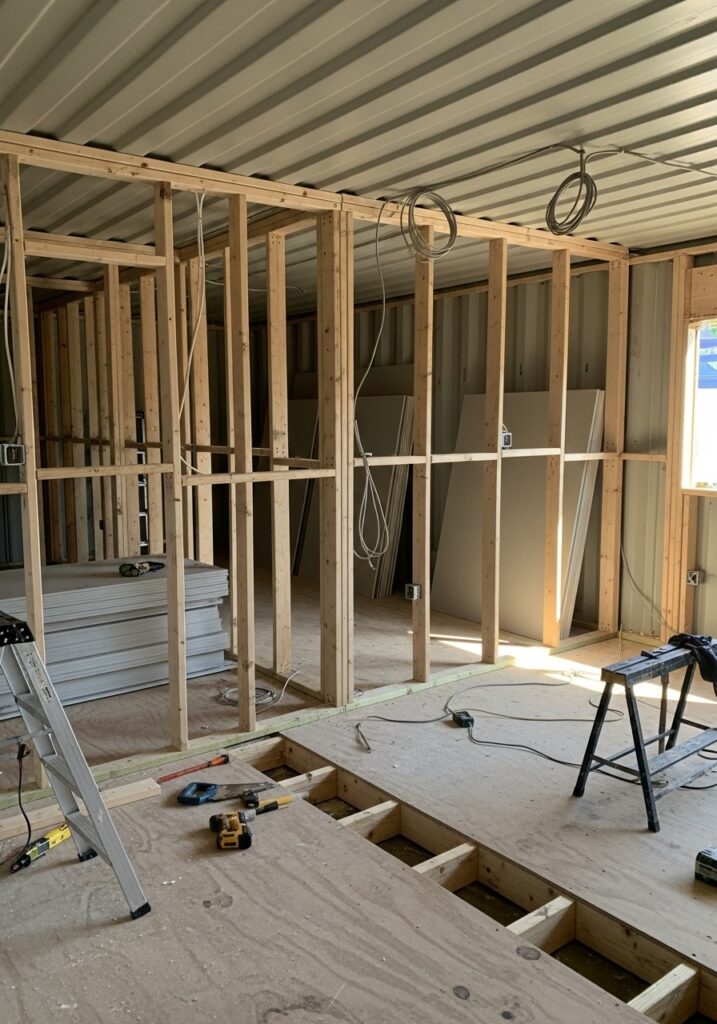
Step 5: Interior Build-Out
Now your container starts feeling like home!
Framing Walls – Use wood or steel framing to install drywall in bedrooms, bathrooms, and kitchens.
Flooring – Raised wooden floors over insulation help maintain thermal comfort. Vinyl, laminate, or polished concrete are excellent choices.
Electrical & Plumbing – Run wiring and pipes before finishing walls. Hiring professionals can be wise for safety and efficiency.
At this stage, your container house DIY project guide comes alive, as your rooms take shape and your vision becomes reality.
Step 6: Exterior Finishing
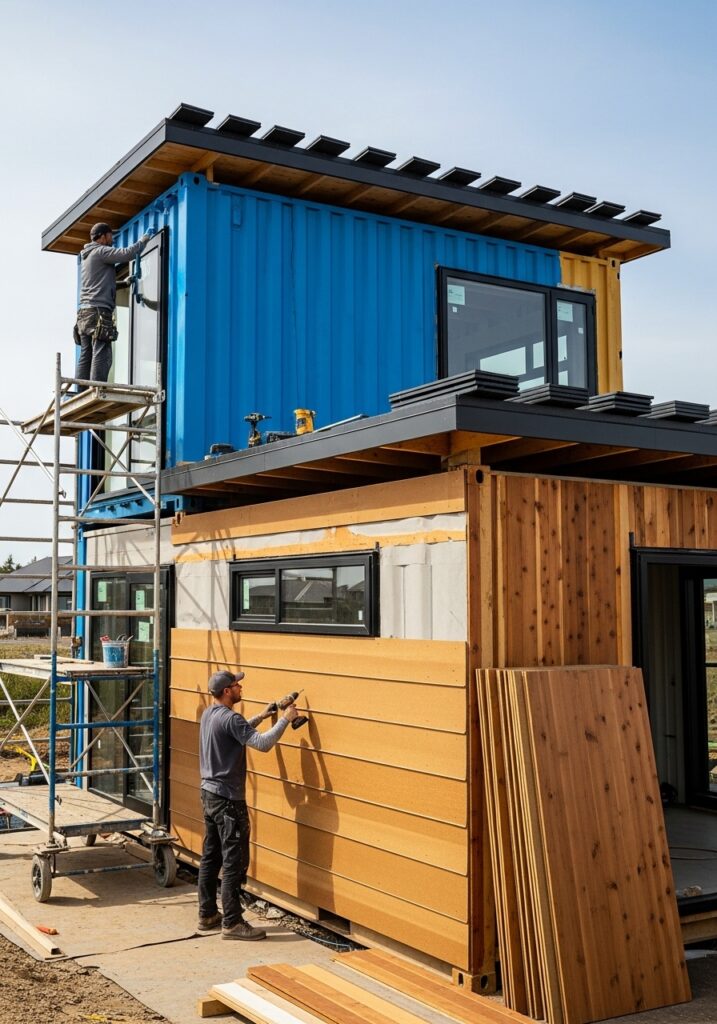
The exterior defines the personality of your home.
Painting – Choose bright, neutral, or bold colors. High-quality, weatherproof paint ensures longevity.
Cladding – Wood panels, corrugated metal, or fiber cement siding add texture and style.
Roofing – Flat roofs are common, but sloped or green roofs improve drainage and aesthetics.
This step is where your build your own shipping container house truly starts to reflect your style.
Step 7: Furnishing and Decorating
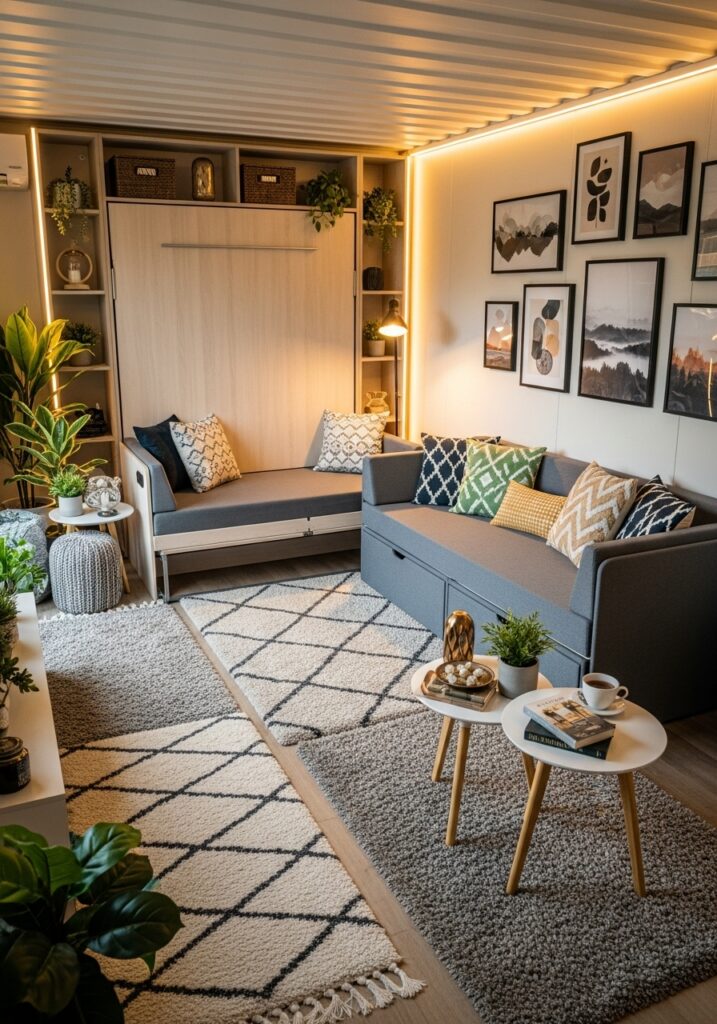
Now comes the fun part—turning your steel box into a cozy haven!
Multifunctional Furniture – Use fold-out beds, nesting tables, and modular storage to maximize space.
Lighting – Mix natural light with warm interior lighting to create ambiance.
Decor – Minimalist decor works well in small spaces, but personal touches like plants, artwork, and textiles bring warmth and character.
With these touches, your elegant modern container home becomes functional and welcoming.
Step 8: Final Checks and Safety
Before moving in, ensure everything is safe and ready.
Structural Integrity – Check all walls, joints, and roof elements.
Utilities Check – Test electricity, plumbing, and HVAC systems.
Safety Measures – Install smoke detectors, fire extinguishers, and secure exits.
Completing these steps rounds out your complete guide to building a container home, leaving you with a safe, stylish, and functional living space.
Step 9: Tips for Budget-Friendly Builds

If cost is a concern, don’t worry! A budget-friendly container home building guide can help you save money without sacrificing quality:
- Repurpose materials from other projects.
- Use recycled wood or furniture for interior finishes.
- Opt for faux-marble countertops instead of real stone.
- DIY small details like planters, shelves, or decorative accents.
These choices make your creative container home building steps affordable yet beautiful.
Step 10: Tiny Container Home Considerations
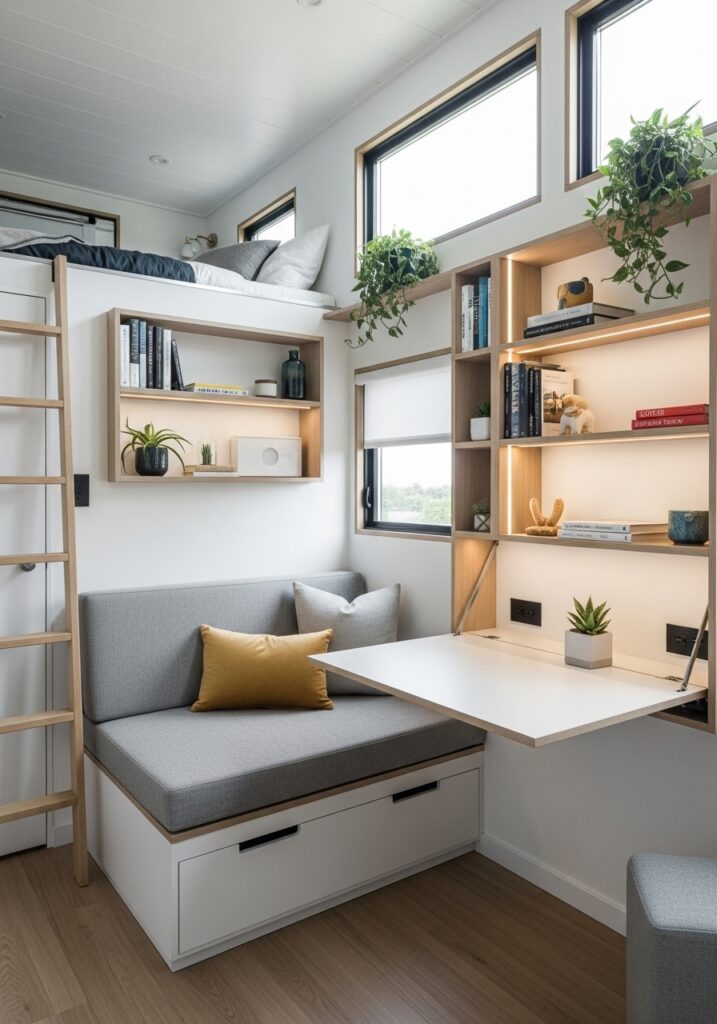
For smaller spaces, tiny container home construction tips can help you maximize efficiency:
- Use built-in furniture to save space.
- Employ vertical storage solutions.
- Opt for multifunctional areas that serve dual purposes.
- Keep decor minimal to avoid visual clutter.
Even the smallest container home can feel luxurious with smart design.
Step 11: Personalizing Your Container Home
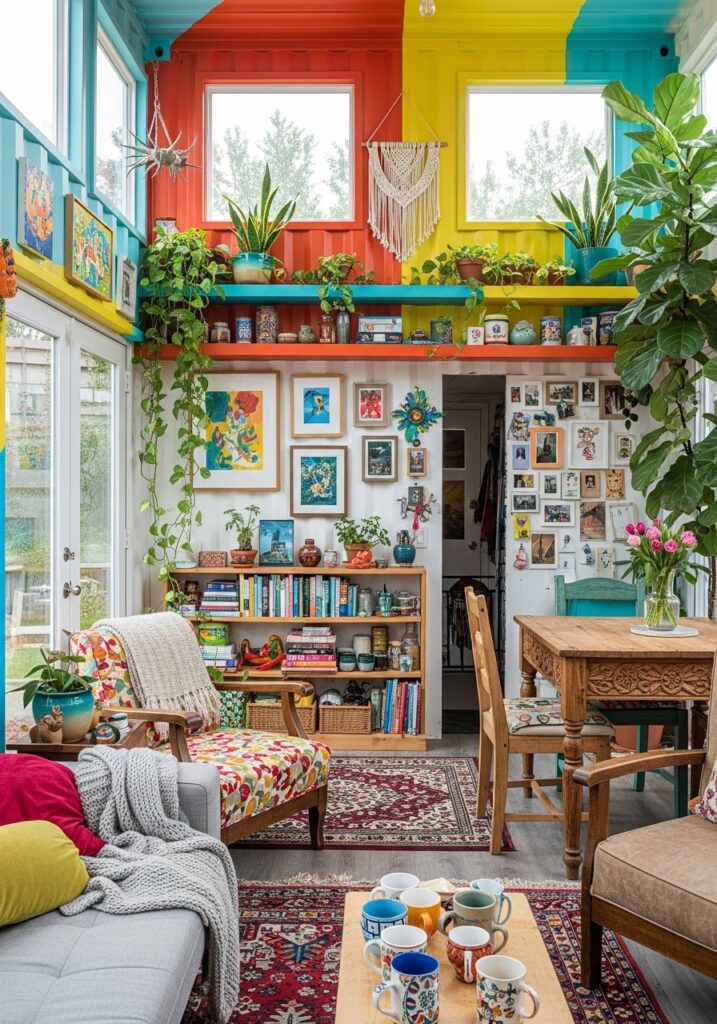
The beauty of a container home is that it’s fully customizable. Incorporate your personality with:
- Colorful exterior paint or cladding.
- Indoor plants for a natural touch.
- Artwork or handmade decor.
- Unique furniture arrangements.
These ideas make your modern container home DIY ideas truly one-of-a-kind, reflecting your taste and creativity.
Conclusion
Building your own container home doesn’t have to be intimidating. With careful planning, smart site prep, and attention to detail, your dream of a DIY container home guide can become reality. From structural integrity to cozy interiors, following step-by-step container home construction ensures a safe, stylish, and comfortable living space.
Whether you’re creating a tiny retreat or a multi-story modern masterpiece, a container home offers flexibility, sustainability, and individuality. So roll up your sleeves, gather your tools, and get ready to build your own shipping container house — your unique, modern home awaits!