DIY Cheap Wood Ceiling Ideas: Transform Your Space Without Breaking the Bank
Ever looked up at your plain, boring ceiling and thought, “This room could use a little personality?” You’re not alone! Ceilings are often the most ignored part of a room—but trust me, with a few DIY cheap wood ceiling ideas, you can completely transform your space. Whether you’re chasing that cozy cabin vibe, modern rustic charm, or just want an affordable wood panel ceiling, this guide is your new best friend.
I’ve been obsessed with budget-friendly home makeovers for years. I’ve tried peel-and-stick panels, faux beams, and even recycled pallets (yep, pallets!)—and the results? Let’s just say… Pinterest-worthy. So grab your coffee (or hammer), and let’s talk about how to give your ceiling a glow-up on a budget.
1. Why Choose a Wood Ceiling in the First Place?
Wood ceilings have this magical way of making any space feel warm, inviting, and finished. They add depth, texture, and a cozy touch that drywall or paint alone just can’t achieve.
Here’s why DIY enthusiasts love them:
- Instant charm: Whether it’s rustic farmhouse or sleek modern, wood fits any style.
- Affordable materials: With creative sourcing, you can find cheap or even reclaimed wood.
- DIY-friendly: You don’t need to be a pro contractor—just a bit of patience and a weekend.
- Huge transformation: A wood ceiling can instantly turn “meh” into “wow.”
So, if your goal is an inexpensive ceiling transformation, wood is the way to go.
2. Budget-Friendly Wood Ceiling Options You’ll Love

Let’s be real—wood projects can get pricey fast. But not these. Here are the most budget-friendly ceiling design ideas that don’t compromise on aesthetics.
a. Peel and Stick Wood Ceiling (The Lazy DIYer’s Dream)
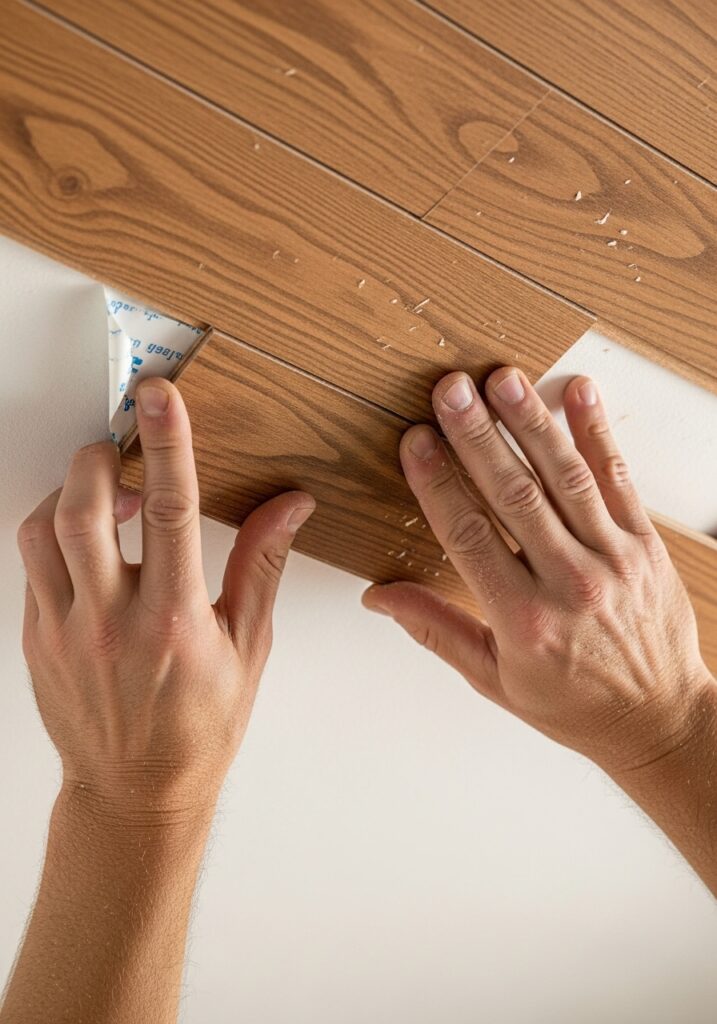
If you want something quick, neat, and stress-free, peel and stick wood ceilings are a total win.
Why it’s awesome:
- No need for nails, screws, or fancy tools.
- You can finish most rooms in a single afternoon.
- Available in tons of shades and wood patterns.
Pro tip: Try brands that use real wood veneer instead of vinyl for a more natural finish.
Best for: Apartments, renters, or anyone who doesn’t want to damage the existing ceiling.
b. Reclaimed Pallet Wood Ceiling
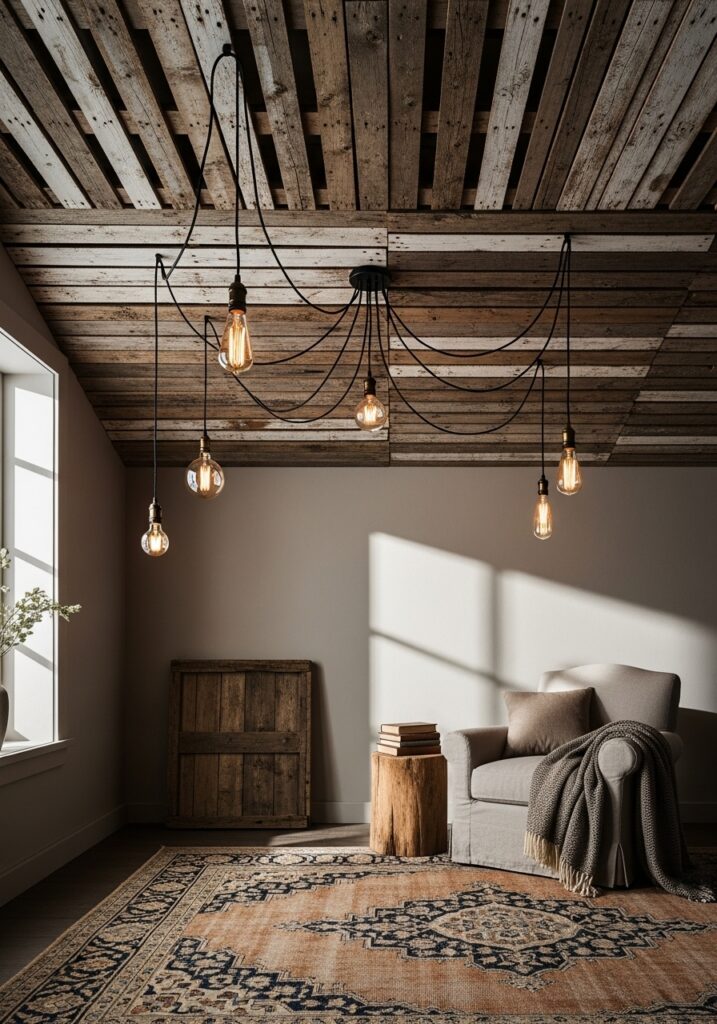
This one’s perfect if you love that rustic, eco-friendly aesthetic. Old pallets are usually free or very cheap, and once cleaned up, they make beautiful panels.
Steps to make it work:
- Collect and disassemble pallets.
- Sand the boards for smoothness.
- Stain or paint them for your preferred look.
- Nail them up in alternating patterns for texture.
You’ll end up with a modern rustic ceiling idea that feels custom-made—and you’ll spend almost nothing.
c. Faux Wood Beams for a Luxe Look
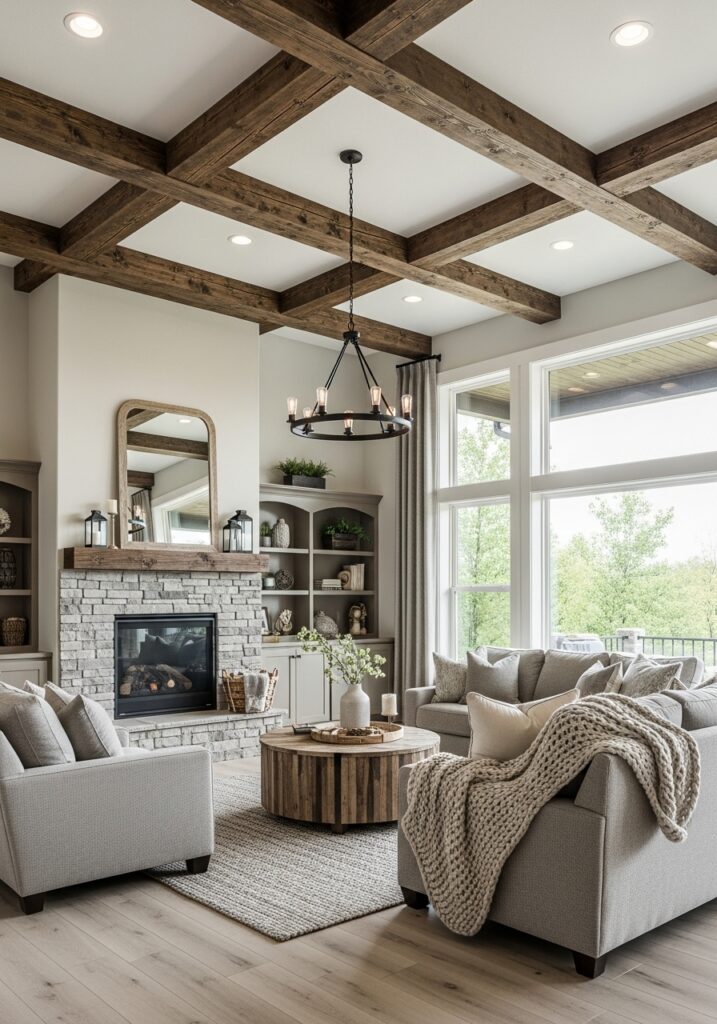
Want to make your living room look like a high-end lodge without the expense? Try faux wood ceiling ideas with lightweight beams made from foam or MDF.
Why it rocks:
- They look shockingly realistic.
- You can install them with adhesive or simple brackets.
- They add instant architectural depth.
Pair this with neutral paint tones or a light wood plank ceiling for that magazine-ready, cozy wood interior design finish.
d. Plywood Panels: The Minimalist’s Budget Hero
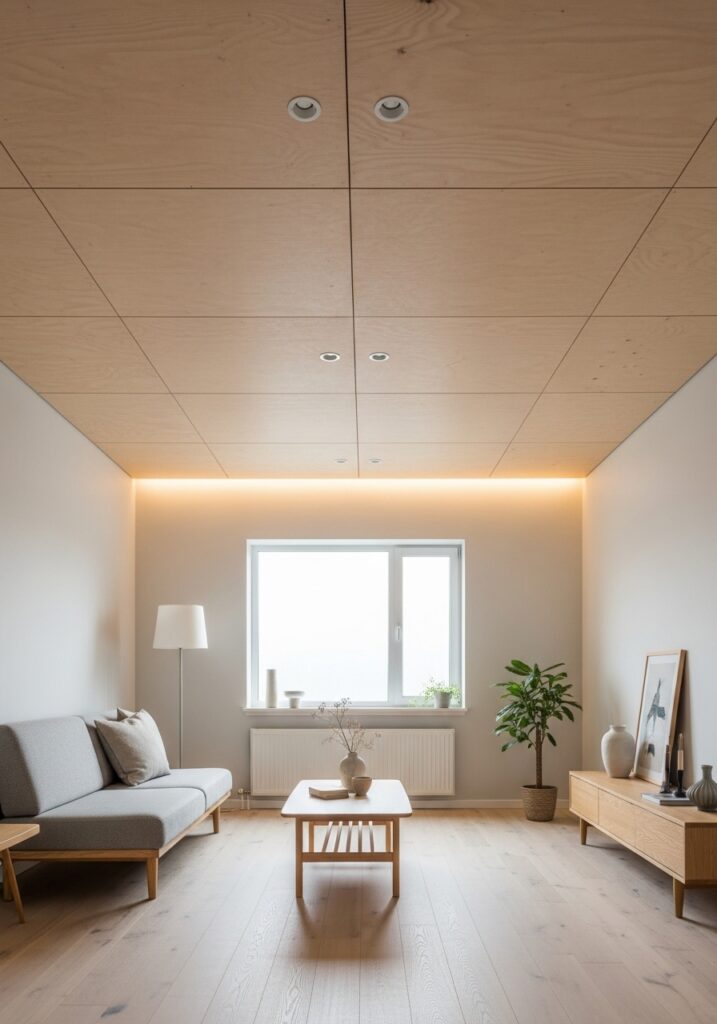
Plywood might sound boring, but when cut into long planks or panels and sealed with matte varnish, it looks stunning.
What you’ll need:
- ¼-inch plywood sheets
- A circular saw
- Construction adhesive
- A clear coat or wood stain
This idea gives you an affordable wood panel ceiling that’s minimalist, Scandi-inspired, and super affordable.
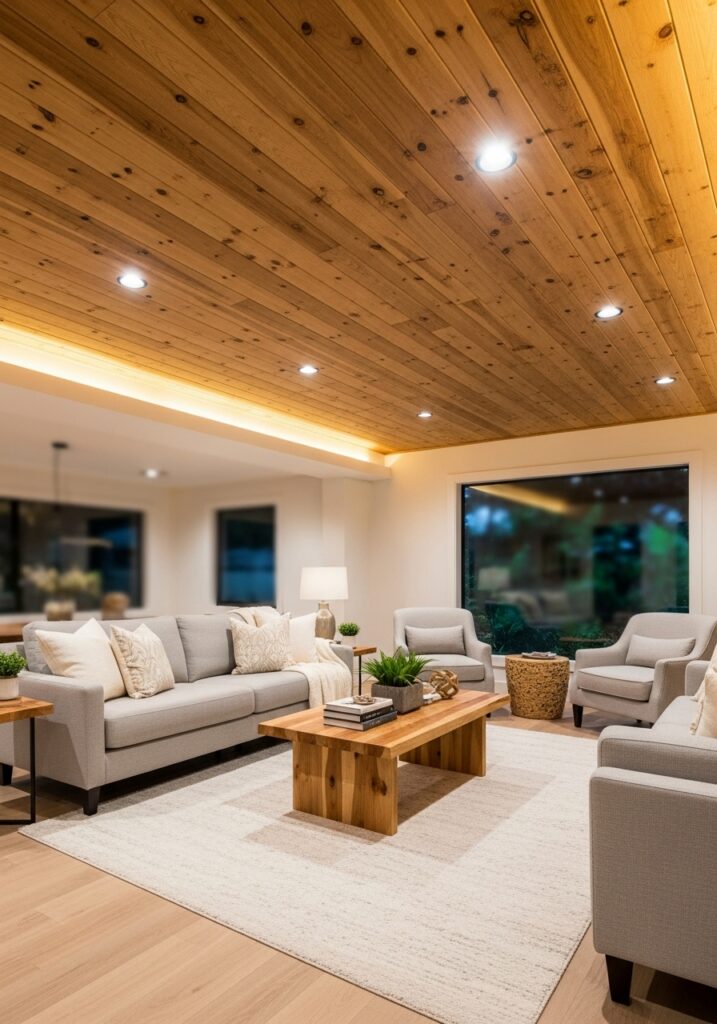
e. DIY Plank Ceiling Using Tongue-and-Groove Boards
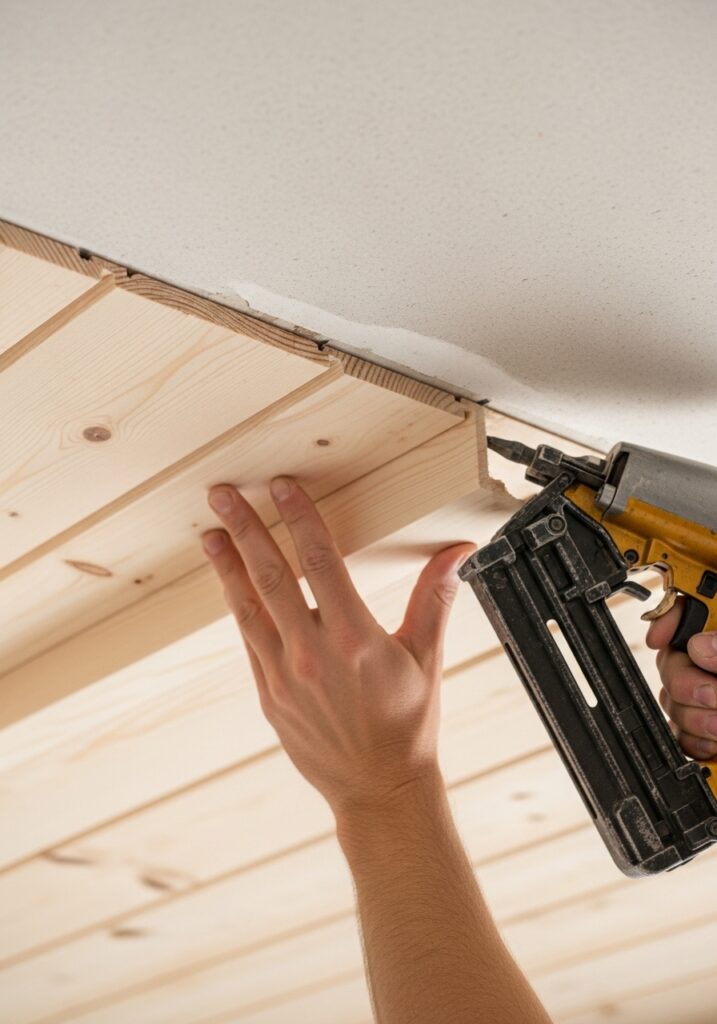
If you’re down for a slightly bigger project, try a DIY plank ceiling.
Why you’ll love it:
- The boards click together easily (no major gaps).
- You can stain or paint them any color.
- It’s a true statement piece for living rooms or bedrooms.
Installation tip:
Use a chalk line to mark your ceiling before attaching boards. That way, you’ll get straight, professional-looking lines.
3. Smart Hacks to Keep Costs Down
When we say “budget-friendly,” we mean really budget-friendly. Here’s how to save even more while doing your DIY ceiling makeover:
a. Source Materials Creatively
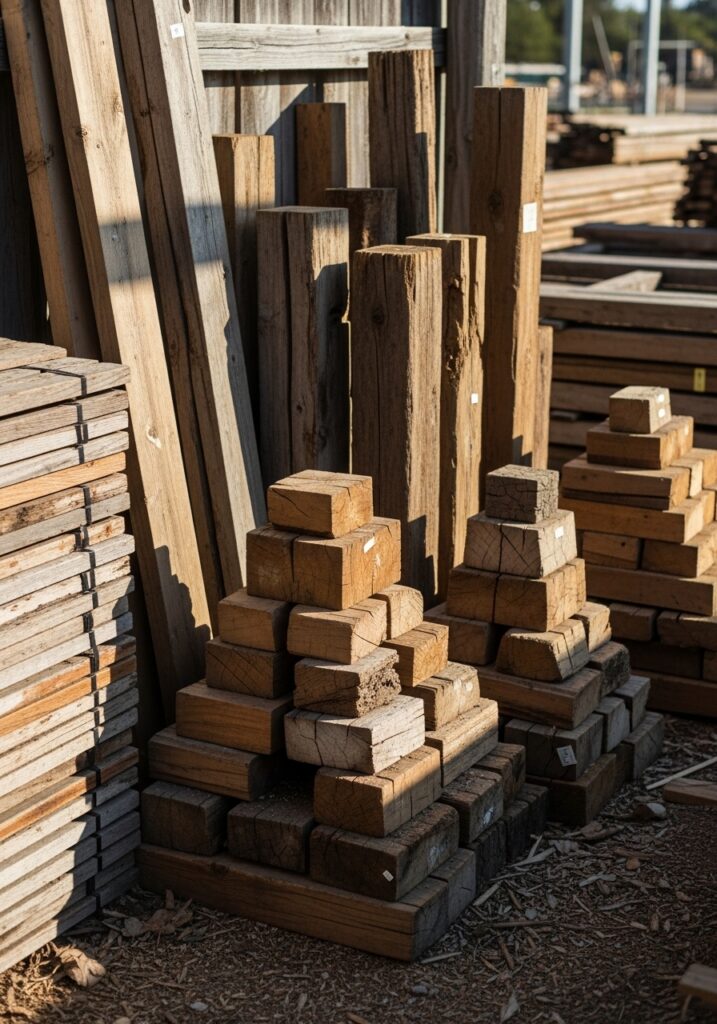
- Check Facebook Marketplace, Craigslist, or local lumberyards for offcuts and clearance pieces.
- Reuse old furniture parts or wall panels—wood is wood!
b. Mix Materials
Combine wood planks with painted sections or beams for a budget-friendly ceiling design that still feels intentional.
c. Paint It Smart
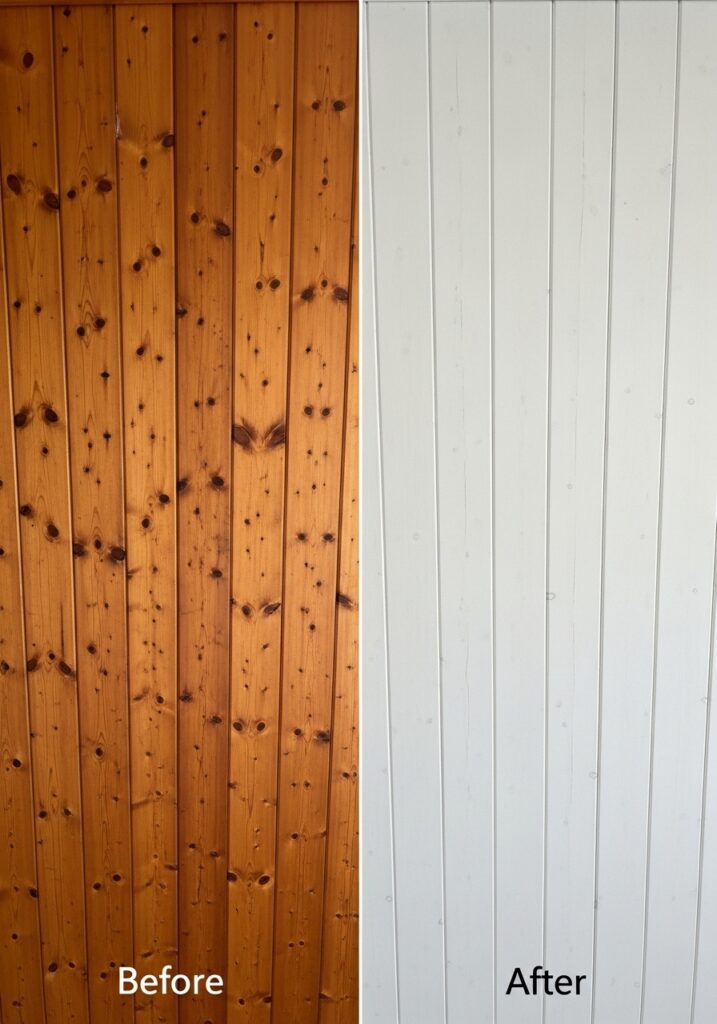
Don’t skip sealing or painting your wood. A simple coat of whitewash or light stain can make even cheap plywood look chic.
d. Do It in Sections
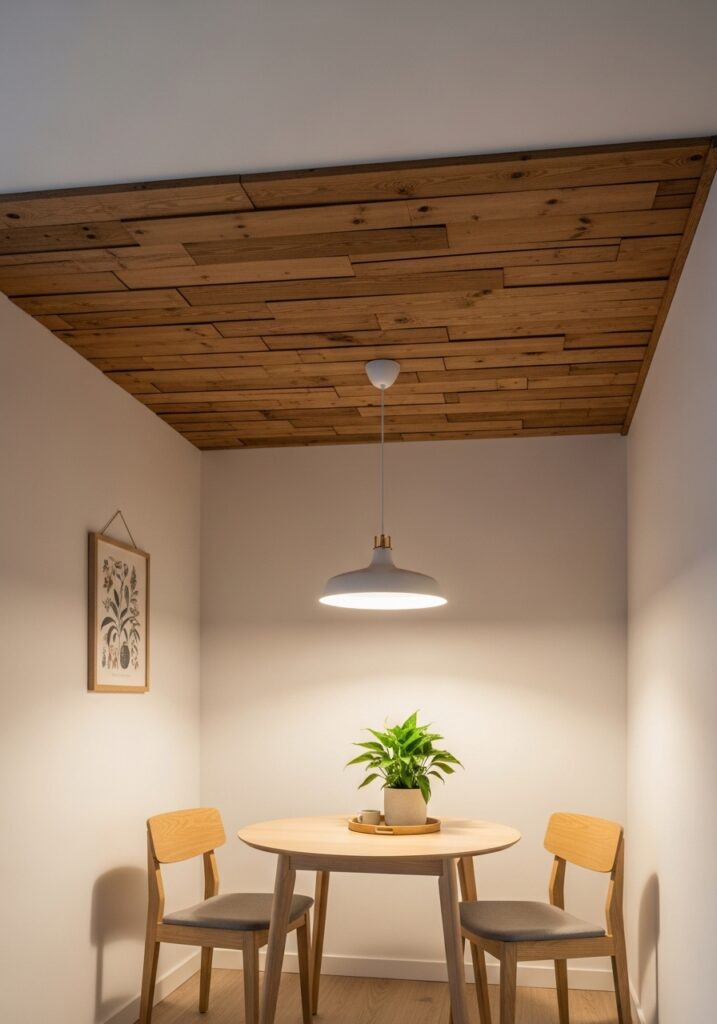
If the full ceiling feels overwhelming, start with one area—like above your dining table or entryway. Small upgrades still create big visual impact.
4. Design Ideas for Different Vibes
Not every space needs to look like a cabin (unless you want it to!). Here are wood ceiling styles to match your aesthetic:
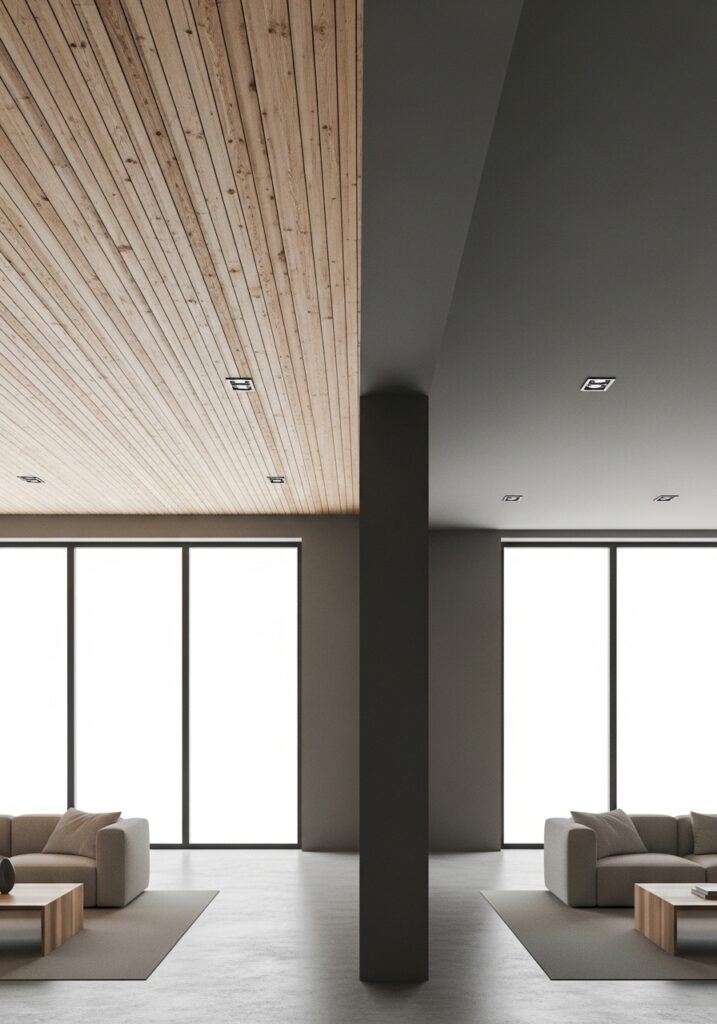
a. Modern Rustic Ceiling Ideas
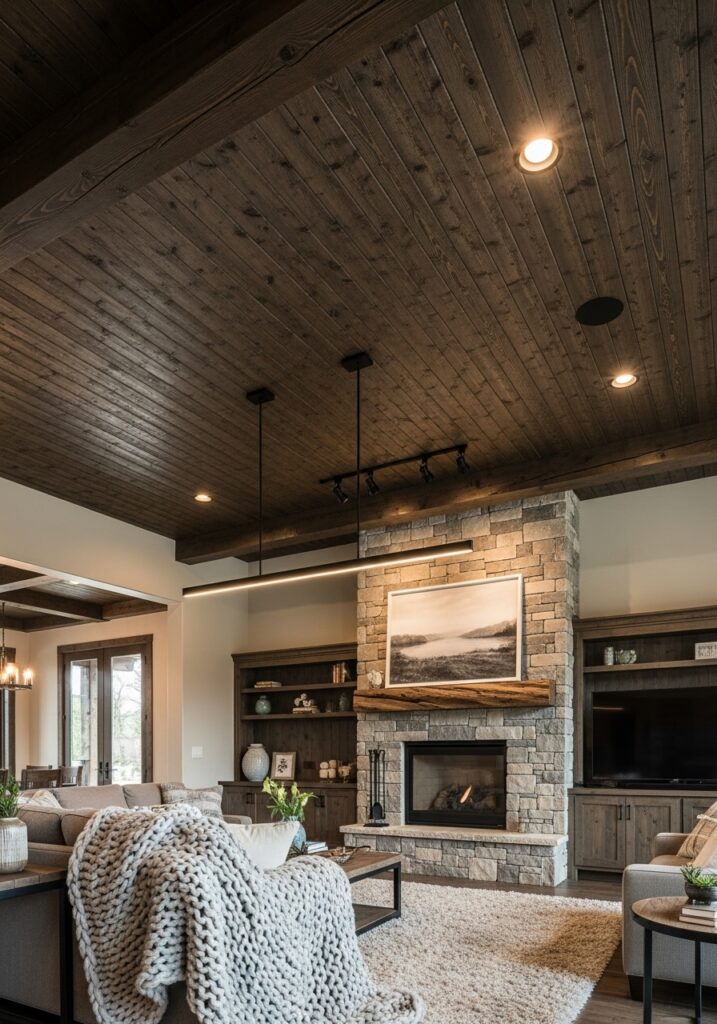
Pair raw wood planks with matte black lighting fixtures or steel accents. Think: farmhouse meets modern loft.
Best colors: Warm oak, espresso, or reclaimed gray.
b. Scandinavian Simplicity
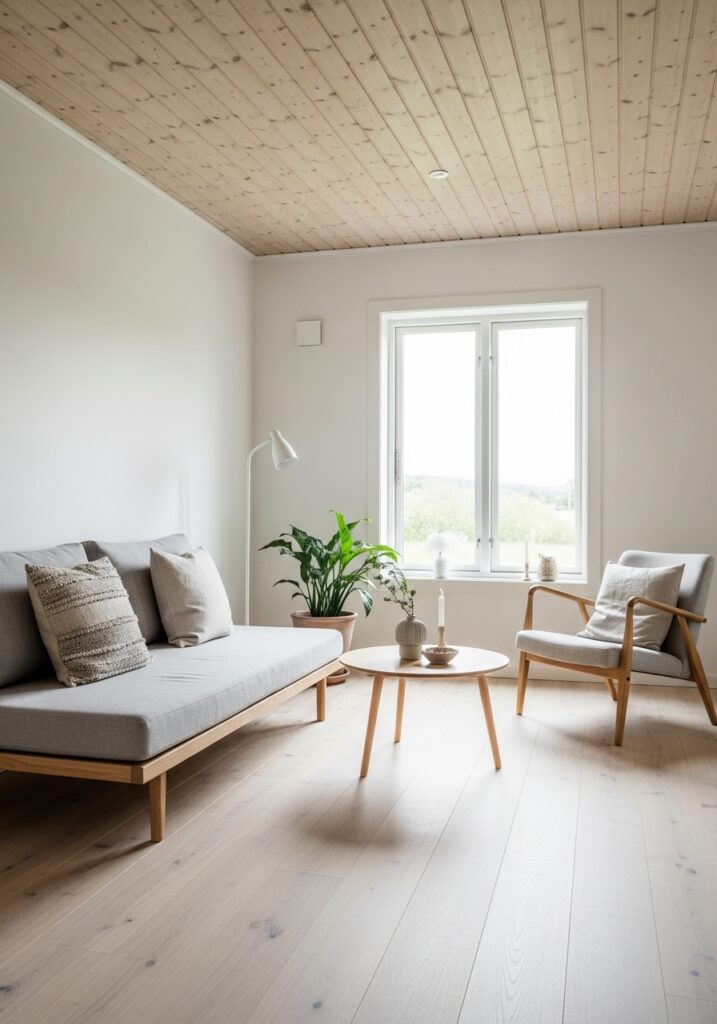
Light-colored plywood or pine boards paired with white walls—bright, airy, and simple.
Why it works: It keeps small spaces looking open but still cozy.
c. Coastal Chic
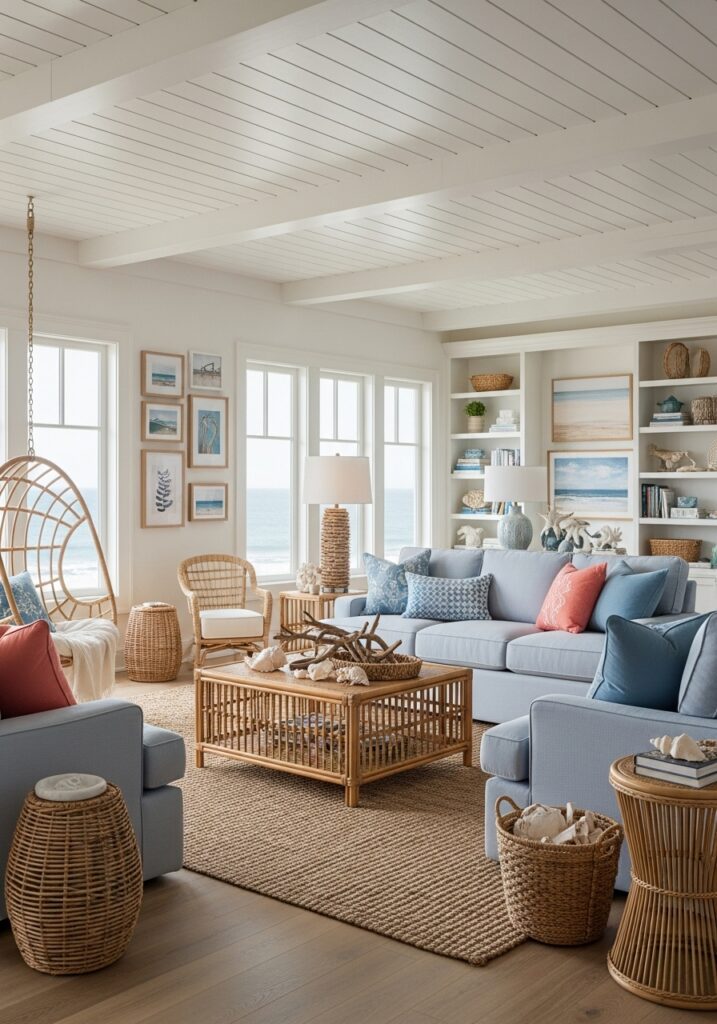
Use whitewashed or driftwood tones for a breezy, beach-inspired vibe.
Decor tip: Add rattan furniture and light linen curtains to complete the look.
d. Industrial Cool
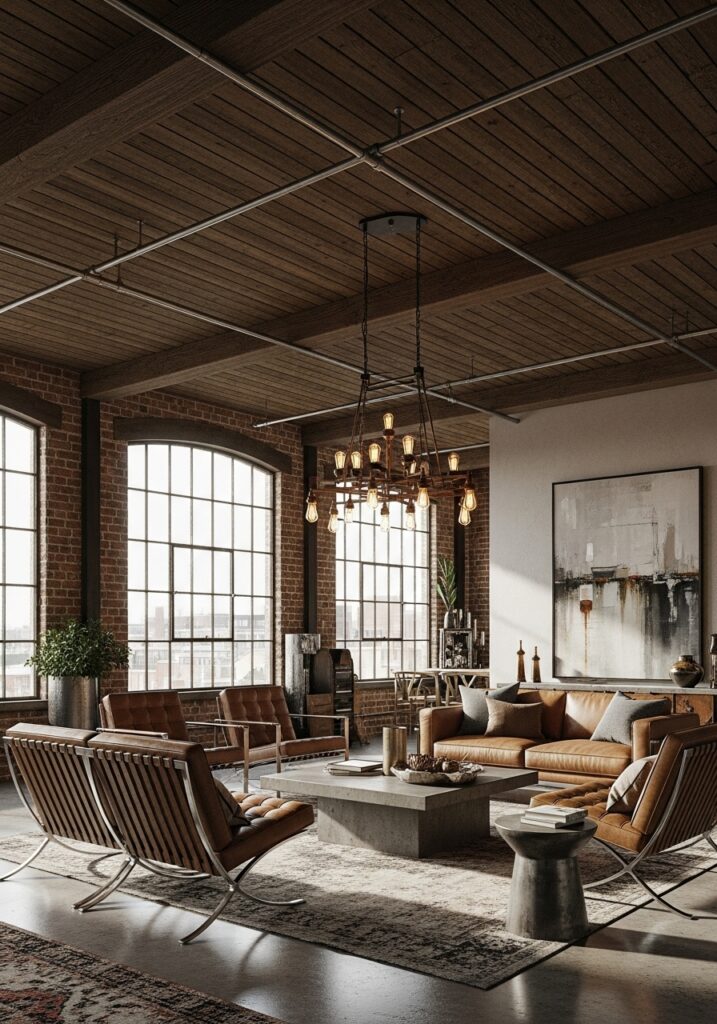
Mix dark-stained planks with exposed pipes and Edison bulbs. A great way to blend faux wood ceiling ideas with a bold, urban edge.
5. Step-by-Step: How to Install a DIY Wood Ceiling (The Easy Way)

Don’t worry—this isn’t as intimidating as it sounds!
Here’s a quick walkthrough for a simple DIY ceiling makeover using wood planks:
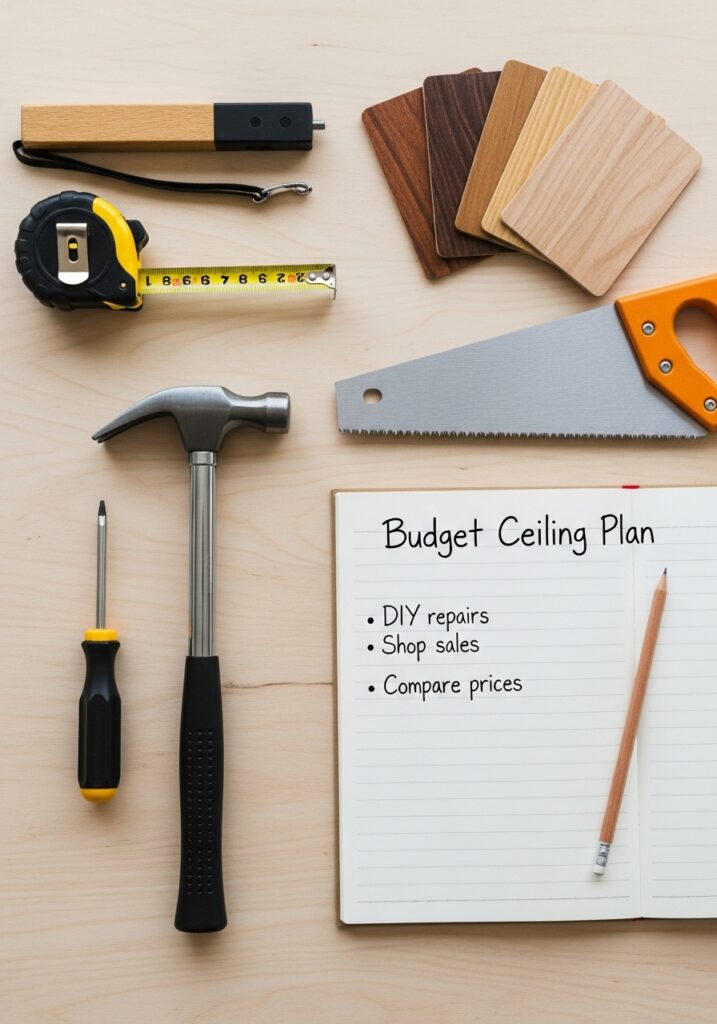
Tools you’ll need:
- Measuring tape
- Saw (hand or electric)
- Nail gun or hammer
- Adhesive
- Level
- Paint or stain
Steps:
- Measure twice, cut once. Determine the size and direction of your planks.
- Find your ceiling joists. Use a stud finder to locate them for extra support.
- Apply adhesive to the back of your plank or panel.
- Nail it in place, starting from one corner and working across.
- Stagger your seams for a natural, professional pattern.
- Seal or stain to protect your new wood ceiling and add character.
FYI, even a beginner can pull this off in a weekend if you prep right.
6. Decorating Around Your New Wood Ceiling
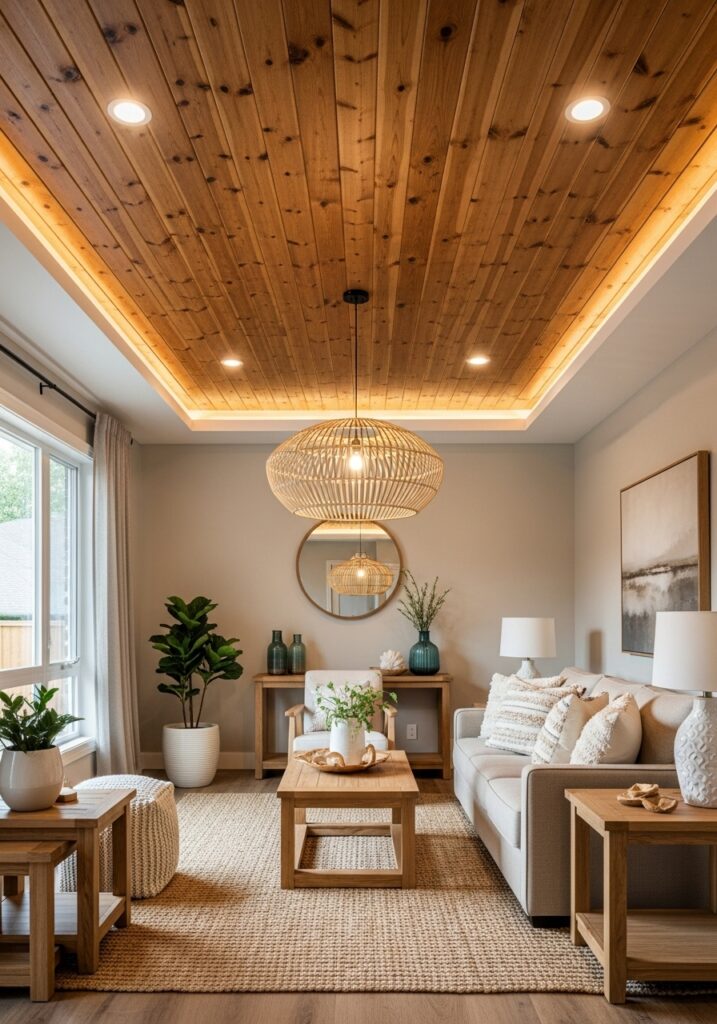
A wood ceiling deserves the spotlight—so make sure the rest of your room complements it.
Here’s how to make it pop:
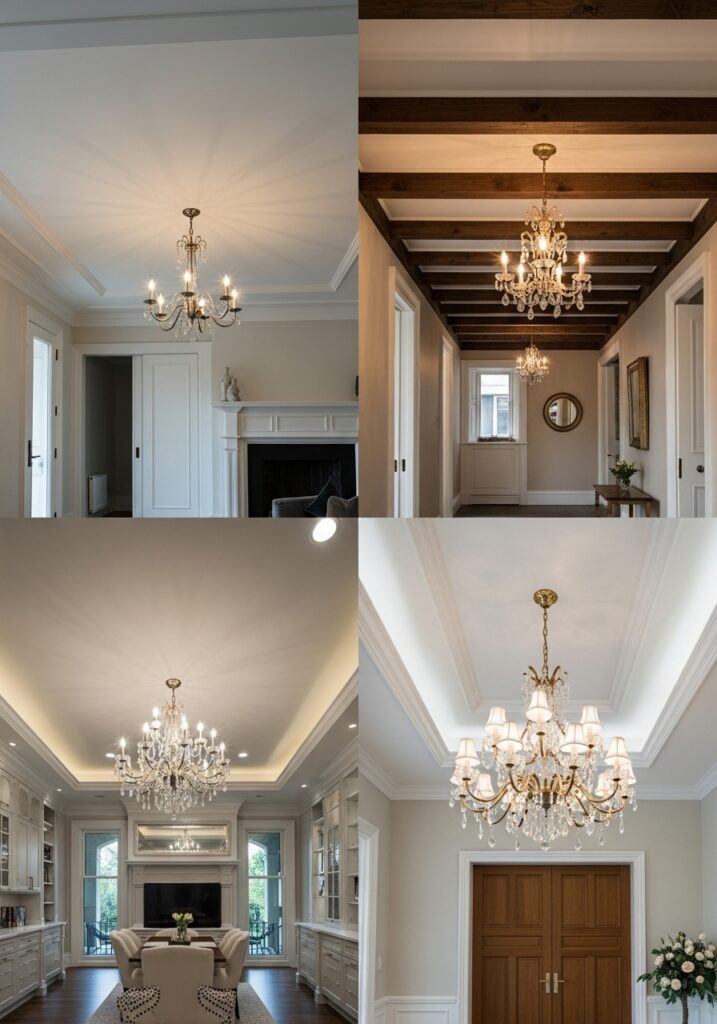
- Add warm lighting: Think recessed lights or chandeliers with golden tones.
- Keep walls neutral: Whites, creams, or soft grays make wood tones stand out.
- Incorporate natural textures: Add linen, jute, or leather elements for a cohesive look.
- Mirror the wood below: Use matching tones in your furniture or flooring for harmony.
The result? A cozy wood interior design that feels intentional, layered, and oh-so-inviting.
7. Real Talk: Pros and Cons of DIY Wood Ceilings
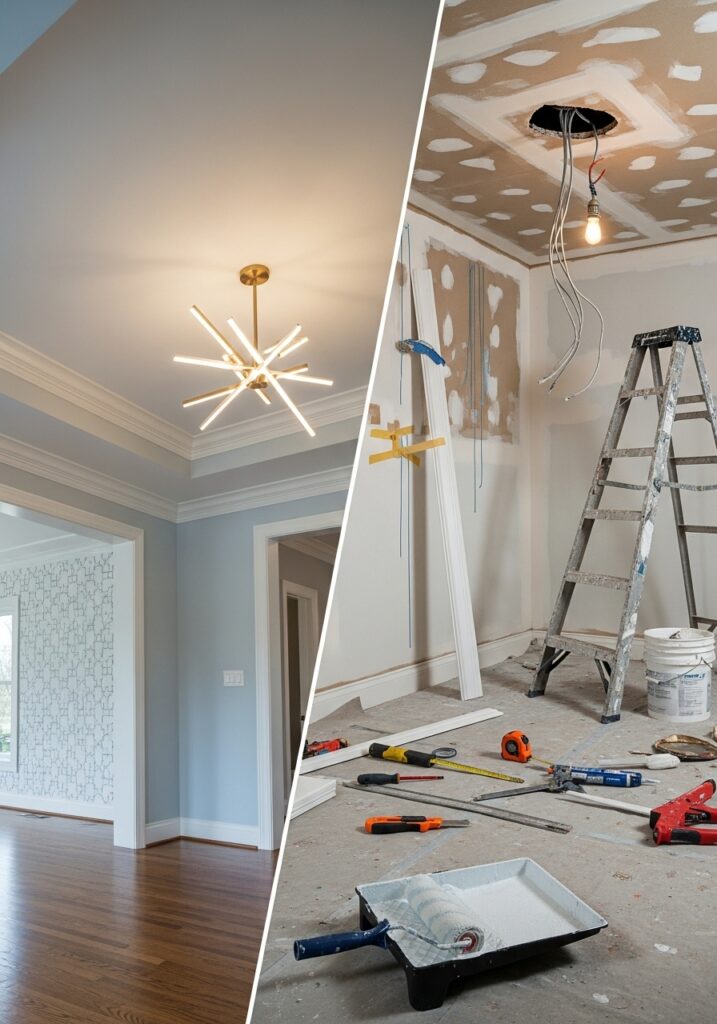
Let’s keep it real—no project is perfect. Here’s what to expect:
✅ Pros
- Budget-friendly upgrade
- Adds texture and warmth
- Customizable in look and tone
- Boosts resale value
⚠️ Cons
- Time-consuming (especially planks)
- May require ceiling prep (like removing popcorn texture)
- Can make rooms feel smaller if using dark tones
IMO, the pros definitely outweigh the cons. Plus, nothing beats the satisfaction of looking up and saying, “Yep, I did that myself.”
8. Quick Budget Breakdown (Approximate)
| Material Type | Estimated Cost per Sq Ft | Skill Level |
|---|---|---|
| Peel & Stick Wood | $2 – $4 | Easy |
| Plywood Panels | $1 – $3 | Moderate |
| Reclaimed Pallet Wood | Free – $1 | Moderate |
| Faux Wood Beams | $5 – $10 | Easy |
| Tongue-and-Groove Planks | $2 – $5 | Intermediate |
So depending on your space and effort level, you can complete an inexpensive ceiling transformation for less than a dinner out.
Conclusion: Ready to Look Up and Smile?
So, there you have it—DIY cheap wood ceiling ideas that can turn any plain room into a cozy masterpiece. Whether you go with peel and stick wood ceilings, DIY plank designs, or even faux wood beams, the key is creativity and confidence.
Start small, stay patient, and have fun with it. Remember, great design doesn’t require a huge budget—just passion, a few tools, and a willingness to get your hands a little dusty.
Next time you kick back in your living room, coffee in hand, and glance up, you’ll feel that little spark of pride. Because you did that. And honestly? It looks amazing.